The short version
A survey is a walk through the property in the order the water flows, writing down what you see and what you measure. Allow thirty minutes to an hour, depending on the size and type of the water system. This lesson takes you through it from the front door to the last outlet.
Before you go
What to take
- A digital thermometer with a probe. Essential. Not an infrared one. Lesson 5 explains why.
- A tape measure, if the property stores water. A tank is measured inside: length, width, height and the depth of the water. A cylinder by its height and width.
- A torch, for a loft, an airing cupboard or the back of a kitchen unit.
- A phone or camera for photographs.
- Something to write on, if you are not recording on the phone.
What to arrange
- Access to every room, the loft, the cupboards with pipework in them, and the outside.
- The hot water on. Ask for the hot water to be on as it normally is, so you measure the system as it normally runs.
- Someone who knows the property, if you can. The tenant knows which taps are used. The landlord knows what has been altered.
HSE points out that the visit does not need to be a special one. Where access is difficult, “appropriate checks can be made by carrying out inspections of the water system, for example during mandatory visits such as gas safety checks or routine maintenance visits”.
Step 1. Ask before you look
Some of the most important facts cannot be seen. Ask the person who lives there, or the landlord:
- Is there any tap, shower, toilet or outside tap that is used less than once a week?
- Has the hot water been running out, running cool or taking a long time to come through?
- Has the property stood empty recently, and for how long?
- Has a bathroom or kitchen been refitted, or anything been taken out?
- Is the hot water on a timer? When was it last on?
- Is anyone in the household older, or living with a long-term illness? Only if they are willing to say.
Record the answers and who gave them.
Stop and thinkThe tenant says every tap is used every day. In the spare room you find an en-suite full of storage boxes. What do you do?Show the answer
Ask about that room in particular. People answer for the taps they think of. A shower behind a stack of boxes is not being used, whatever the general answer was. Record what you saw and what you were told.
Step 2. Where the water comes in
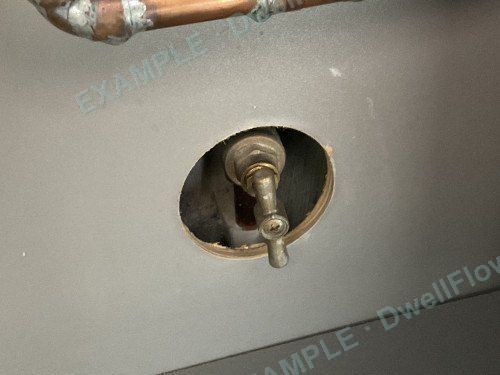
- Find the internal stop tap. Note where it is. Check that it can be reached. Turn it gently a little each way to see that it moves, without forcing it, and leave it fully open.
- Look at the pipe that feeds it. Note what it is made of. A dull grey, soft-looking pipe that scratches to a shiny silver may be lead. Lead is a drinking water matter and not a legionella one, but it should be recorded and not ignored.
- Look at the insulation on the visible pipework around it.
- Take the incoming cold temperature at the nearest cold tap. This is the baseline for every cold reading that follows.
Step 3. What heats and stores the water
Work out which of the three systems from Lesson 3 you are looking at. Then record what is there.
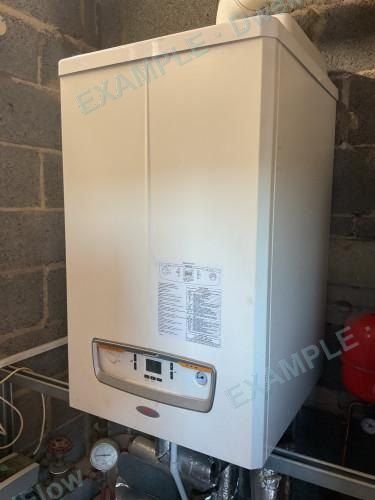
A combi boiler
- Where it is, and its make and model from the label.
- Whether a filling loop has been left connected underneath it.
- That there is no cylinder and no tank in use. Check the loft for a tank that was left behind.
A hot water cylinder
- Where it is, whether it is vented or unvented, and its size from the label or from its height and width.
- The thermostat setting, where there is a dial you can read.
- Whether it and its pipework are insulated.
- On an unvented cylinder, that there is an expansion vessel, and the date on it if one is shown.
- The stored temperature, measured at the nearest hot tap.
A cold water tank
- Where it is and what it is made of, if you can tell.
- Whether it has a lid, and whether the lid fits closely.
- Whether it is insulated, top and sides.
- What the water and the inside look like: clear or cloudy, clean or with sediment, rust or slime.
- Whether the overflow and vent have screens.
- Its inside dimensions and the depth of the water.
- The temperature of the water, away from the float valve.
- Which outlets it feeds, as far as you can tell.
Stay safe. Only enter a loft that is boarded, lit and safe to move about in. Do not lean on a tank or its pipework. Do not disturb a tank whose material you cannot identify. Do not open, adjust or test the valves on an unvented cylinder, and do not remove electrical covers. If something cannot be checked safely, record that it could not be checked.
Step 4. Every room with water in it
Go through the property room by room. A sensible order is to start nearest the stop tap and finish at the outlet furthest from it. In each kitchen, bathroom, en-suite, cloakroom and utility room, record:
| What | What to record |
|---|---|
| Each outlet | What it is: sink, basin, bath, shower, toilet, appliance connection. Whether it works. How often it is used. |
| Temperatures | Hot and cold, at the outlets you have chosen to test. Whether each outlet is blended. |
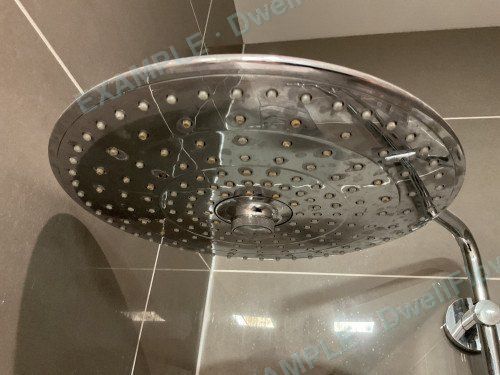
| Showers | The type: electric, mixer or thermostatic. The condition of the head and hose. Whether the hose can reach the toilet or lie in the bath water. |
| Scale and deposits | Limescale, staining or slime on taps, heads and spouts. |
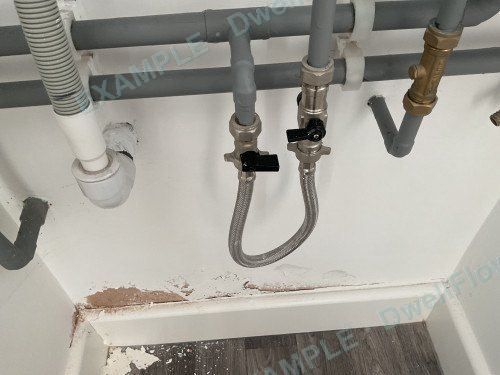
| Under and behind | Open the cupboard under each sink and basin. Look for flexible hoses, filters, capped pipes, pipes touching each other and missing insulation. |
| Anything removed | A blanked-off pipe, a patch in the tiles, a space where an appliance was. Follow the pipe back if you can see it. |
| Special equipment | A whirlpool bath, a boiling water tap, a water softener, a filter, a point-of-use heater. |
Run every outlet at least once, even the ones you are not taking a temperature at. An outlet that gives no water, or gives rusty or discoloured water at first, is a finding.
Step 5. Outside
- Outside taps. Whether a hose is left connected, and whether the tap has a check valve behind it.
- Hoses, sprinklers and pressure washers. Whether they are kept at the property and what they are run from.
- Water butts. Whether one is in use and whether it feeds anything that sprays.
- Garages and outbuildings. Any tap, sink or appliance connection.
- Hot tubs. A hot tub is a spa pool in HSE’s terms, with its own guidance (HSG282) and its own routine. It is outside an ordinary hot and cold water assessment. Record that it is there.
Step 6. Photographs
A photograph turns a statement into evidence. Take them as you go:
- the stop tap, and the incoming pipe
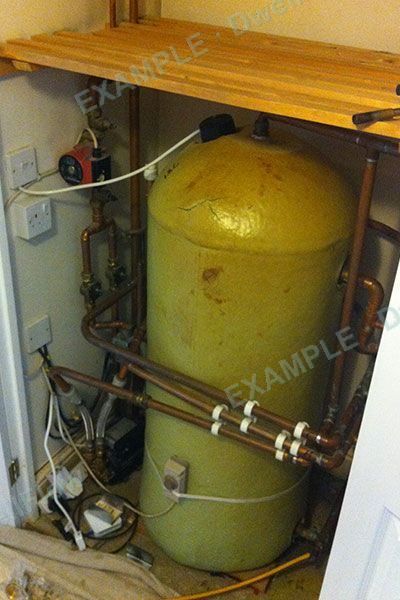
- the boiler or cylinder, and its label
- the tank: outside, lid, and the inside with the lid lifted
- each shower head
- anything you are recording as a finding
- anything you could not identify
How to take them:
- Straight on, in good light. Use the torch.
- One close enough to read a label or see the detail.
- One wider, so a reader can see where it is.
- If a label is unreadable, photograph it anyway. It shows that you looked.
Step 7. When you cannot tell
You will meet things you cannot reach, cannot see or cannot identify. Every surveyor does. There are two honest answers, and both are better than a guess:
- “I could not get to it.” A locked room, an unsafe loft, a boxed-in cylinder.
- “I could not identify it.” A fitting you do not recognise, a pipe whose purpose is not clear, a material you cannot name.
Record which, photograph what you can, and move on. The assessment then says what was not checked, and the landlord can arrange for it to be. A guess does the opposite: it hides the gap behind a statement that may be wrong, on a document that may be shown to a tenant.
Stop and thinkUnder the stairs you find a small white vessel on the pipework that you do not recognise. What do you record?Show the answer
That there is a fitting you could not identify, where it is, and a photograph of it. You do not have to name it. The engineer who services the system can, and the assessment will ask for that. Writing down a name you are not sure of is worse than writing down that you do not know.
Step 8. Before you leave
- Read back through what you have recorded while you are still in the property. A missing reading is easy to take now and awkward to take next week.
- Check that every room with water in it has been covered.
- Check that every finding has a photograph.
- Leave every tap off, the stop tap fully open, and the loft hatch and tank lid closed.
- Tell the tenant anything they need to know today, such as a shower head that needs cleaning.
From survey to assessment
A survey is the evidence. The assessment is what the evidence means: which findings are a risk, how serious each one is, what should be done about it and by when. HSE’s brief guide says a risk assessment should include:
- management responsibilities, including the name of the competent person
- a description of the system
- any potential risk sources
- any controls currently in place to control risks
- monitoring, inspection and maintenance procedures
- records of the monitoring results, inspection and checks carried out
- a review date
Lesson 7 covers what to do about each kind of finding, and Lesson 8 covers the record.
Where DwellFlow fits
Everything in this lesson can be done with a notebook. DwellFlow does the same survey on your phone. It asks one question per screen, in the order the water flows, and only the questions that apply to the system you have told it about. It says what each photograph should show, and it works in a loft with no signal. Before you submit, AI reads the whole survey back and asks about anything that looks incomplete, while you are still in the house. Then AI writes the risk assessment, a sheet for the tenant and a written scheme of control, with the HSE clause behind every recommendation.
You can start without paying and see what the survey found before you decide. The documents are £9.99 ex VAT a property. There is a full example report to read first, and a three-and-a-half-minute video of the survey itself.